

Introduction to Repotting Plants
Repotting plants is a fundamental part of plant care that is often overlooked. It’s a simple process that can significantly improve the health and longevity of your plants. In this section, we will explore the importance and benefits of repotting plants.
- Importance of Repotting Plants
- Benefits of Repotting Plants
Repotting plants is crucial for several reasons. Firstly, it provides your plants with fresh soil, which is rich in essential nutrients that plants need to grow and thrive. Over time, the soil in your plant’s pot can become depleted of these nutrients. Secondly, repotting allows you to check the health of your plant’s roots and remove any dead or diseased parts. Lastly, repotting gives your plant more room to grow. As a plant grows, its roots can become crowded in its current pot, which can stunt its growth and even cause it to die.
Repotting plants offers numerous benefits. It promotes healthier growth by providing plants with more space and fresh, nutrient-rich soil. It also helps prevent root rot and other diseases by allowing you to remove dead or diseased parts of the plant. Furthermore, repotting can rejuvenate an older plant, giving it a new lease on life. Finally, repotting can improve the appearance of your plant, making it a more attractive addition to your home or garden.
In the following sections, we will delve deeper into the best practices for repotting plants, a step-by-step guide to doing it correctly, and common mistakes to avoid. Whether you’re a seasoned plant parent or a beginner, this guide will equip you with the knowledge and skills to repot your plants successfully.
Best Practices for Repotting Plants
Repotting plants is an essential part of plant care. It allows your plants to grow and thrive in a healthy environment. In this section, we will discuss the best practices for repotting plants, starting with choosing the right time to repot.
Choosing the Right Time to Repot
One of the most crucial aspects of repotting is timing. Choosing the right time to repot can significantly impact the health and growth of your plant. Let’s delve into understanding when to repot plants and the signs that your plant needs repotting.
- Understanding when to repot plants
- Signs your plant needs repotting
Repotting is not a routine that needs to be done frequently. It’s usually best to repot plants in the spring or early summer when they’re in their active growing phase. This gives them ample time to adjust to the new pot and soil before the colder months set in. However, if you notice signs of distress in your plant, it may need to be repotted regardless of the season.
There are several signs that your plant may need repotting. These include roots growing out of the drainage holes, water sitting on the surface of the soil for a long time, or the plant becoming top-heavy and tipping over. Additionally, if your plant is growing slower than usual or its leaves are yellowing, it might be time to consider repotting.
Remember, repotting is a stressful process for plants, so it’s essential to do it correctly and at the right time. By understanding when to repot and recognizing the signs that your plant needs repotting, you can ensure your plants continue to grow and thrive.
Selecting the Appropriate Soil
When it comes to repotting plants, the soil you choose plays a vital role in the health and growth of your plant. Let’s delve into the importance of repotting plant soil and how to select the right one for your plant.
- Importance of Repotting Plants Soil
- How to Choose the Right Soil for Your Plant
- Know Your Plant: Research your plant’s natural habitat. Does it thrive in sandy soil or does it prefer a loamy mix? Understanding your plant’s needs will guide you in selecting the appropriate soil.
- Check the pH Level: Some plants prefer acidic soil, while others need alkaline soil. Knowing the pH preference of your plant can help you choose the right soil.
- Consider Drainage: Some plants need well-draining soil, while others prefer to stay moist. Make sure the soil you choose matches your plant’s water needs.
Repotting is not just about giving your plant a new home. It’s also about replenishing the soil that nourishes your plant. Over time, the nutrients in the soil deplete, making it less effective in supporting plant growth. By repotting, you are essentially refreshing the plant’s environment with new, nutrient-rich soil. This promotes healthier growth, stronger roots, and a more vibrant plant.
Not all soils are created equal. Different plants have different soil requirements, and using the wrong type can hinder your plant’s growth. Here are some tips to help you choose the right soil:
In conclusion, selecting the appropriate soil is a crucial step in the repotting process. By understanding the importance of repotting soil and how to choose the right one, you can ensure your plant thrives in its new home.
Step-by-Step Guide to Repotting Plants
Repotting plants is a necessary task to ensure their healthy growth. It might seem like a daunting task, but with the right steps, it can be done easily and efficiently. Here’s a simple, step-by-step guide to help you repot your plants.
- Preparing your plant for repotting
- Removing the plant from its current pot
- Placing the plant in the new pot
- Adding soil and watering the plant
Before you start, make sure your plant is ready for repotting. Water the plant a day before the repotting process. This will make the plant easier to remove from its current pot and reduce the shock of repotting. Also, gather all the necessary materials such as a new pot, fresh soil, a trowel, and gloves.
Hold the plant at the base, near the soil level, and gently pull it out of the pot. If it’s stuck, tap the sides of the pot to loosen the soil. Be careful not to pull too hard as it may damage the plant’s roots.
Once the plant is out, it’s time to place it in the new pot. Make sure the new pot is clean and has drainage holes. Place a layer of fresh soil at the bottom of the pot. Then, place the plant in the center of the pot, making sure it’s standing upright.
Fill the rest of the pot with soil, leaving about an inch of space from the top. Gently pat the soil down to remove any air pockets. After repotting, water the plant thoroughly. This helps the soil settle around the roots. Remember, overwatering can lead to root rot, so make sure the soil is moist, not soggy.
And there you have it! A step-by-step guide to repotting your plants. With a little bit of practice and patience, you’ll be a pro in no time.
| Step | Instructions |
|---|---|
| Preparing your plant for repotting | Water the plant a day before repotting and gather necessary materials. |
| Removing the plant from its current pot | Hold the plant at the base and gently pull it out. If stuck, tap the sides of the pot. |
| Placing the plant in the new pot | Place a layer of fresh soil at the bottom of the pot. Place the plant in the center. |
| Adding soil and watering the plant | Fill the pot with soil and water the plant thoroughly. |
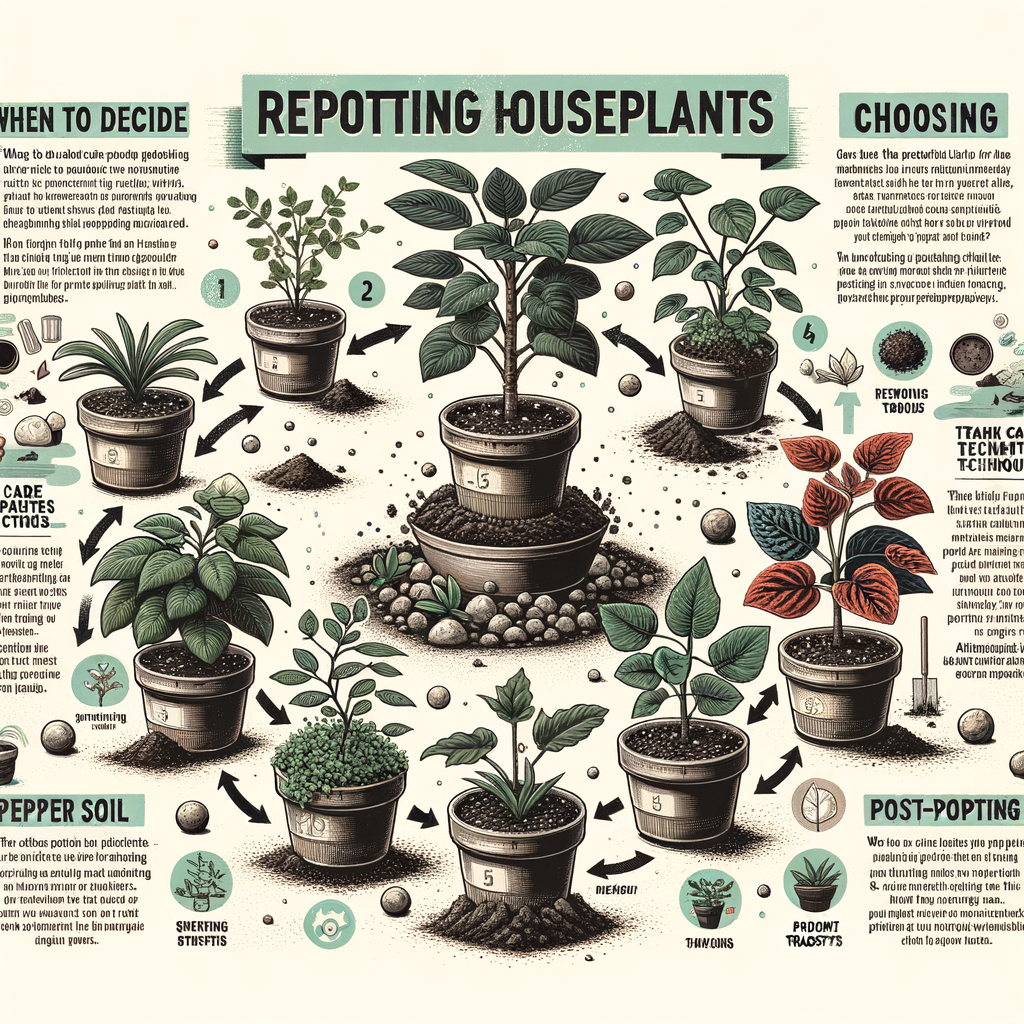
Repotting Specific Types of Plants
Every plant is unique and requires specific care when it comes to repotting. In this section, we will focus on indoor plants, providing you with helpful tips and a case study on repotting a snake plant.
Indoor Plant Repotting
Indoor plants can bring life and color to any room. However, they need to be repotted from time to time to ensure they stay healthy and vibrant. Here are some tips and a case study to guide you through the process.
- Repotting Houseplants Tips
- Choose the right time: The best time to repot most houseplants is during their growing season, usually in spring or early summer.
- Select the right pot: The new pot should be slightly larger than the old one, providing room for growth but not so large that the plant drowns in soil.
- Prepare the pot: Add a layer of fresh potting soil to the bottom of the pot.
- Remove the plant: Carefully remove the plant from its old pot, trying not to damage the roots.
- Place the plant: Position the plant in the new pot and fill in with potting soil, pressing gently to remove air pockets.
- Water the plant: After repotting, give the plant a good watering and place it in a location with appropriate light.
- Case Study: Repotting a Snake Plant
Repotting your houseplants doesn’t have to be a daunting task. Here are some simple steps to follow:
The snake plant, also known as Sansevieria, is a popular indoor plant due to its low maintenance requirements and striking appearance. Let’s take a look at how to repot this specific plant:
| Step | Instructions |
|---|---|
| 1. Choose the right time | Snake plants are slow growers, so they only need to be repotted every 2-3 years. |
| 2. Select the right pot | Choose a pot that is only slightly larger than the current one. Snake plants prefer to be slightly root-bound. |
| 3. Prepare the pot | Add a layer of fresh potting soil mixed with sand for better drainage. |
| 4. Remove the plant | Be gentle when removing the snake plant from its old pot to avoid damaging the roots. |
| 5. Place the plant | Position the plant in the new pot and fill in with the soil-sand mix. |
| 6. Water the plant | Water the plant sparingly, as snake plants prefer drier conditions. |
Outdoor Plant Repotting
Repotting outdoor plants is a crucial part of gardening. It helps to keep your plants healthy and vibrant. In this section, we will explore how to repot outdoor plants and provide a case study on repotting a rose bush.
- How to repot outdoor plants
Repotting outdoor plants might seem like a daunting task, but with the right steps, it can be done with ease. Here’s a step-by-step guide:
- Choose the right pot: The new pot should be slightly larger than the current one, allowing enough room for the roots to grow.
- Prepare the pot: Add a layer of fresh potting soil at the bottom of the new pot. This will provide a good base for the plant.
- Remove the plant: Gently remove the plant from its current pot. Be careful not to damage the roots.
- Place the plant: Place the plant in the new pot and fill it with potting soil. Make sure the plant is at the same depth as it was in the old pot.
- Water the plant: After repotting, water the plant thoroughly. This will help the roots to settle in the new pot.
- Case study: Repotting a rose bush
Rose bushes are popular outdoor plants that often need repotting. Let’s take a look at a case study on repotting a rose bush.
John, an avid gardener, noticed that his rose bush was not blooming as much as it used to. He decided to repot the rose bush. He chose a pot that was slightly larger than the current one and added a layer of fresh potting soil at the bottom. He then carefully removed the rose bush from its current pot, making sure not to damage the roots. He placed the rose bush in the new pot and filled it with potting soil. After repotting, he watered the rose bush thoroughly.
After a few weeks, John noticed a significant improvement in the health and blooming of his rose bush. This case study shows the importance of repotting outdoor plants and the impact it can have on their health and growth.
Common Mistakes in Repotting Plants and How to Avoid Them
Repotting plants is a crucial part of plant care. However, it’s easy to make mistakes if you’re not careful. Let’s explore some of the most common errors people make when repotting plants and how to avoid them.
- Overwatering after repotting
One of the most common mistakes is overwatering the plant after repotting. While it’s important to water the plant after repotting, too much water can lead to root rot, a serious condition that can kill the plant. To avoid this, water the plant thoroughly but make sure the pot has good drainage to prevent water from pooling at the bottom.
- Using the wrong soil
Another common mistake is using the wrong type of soil. Different plants require different types of soil to thrive. For example, succulents and cacti need a fast-draining soil mix, while ferns prefer a more water-retentive mix. Using the wrong soil can lead to poor plant health and growth. Always research the specific soil needs of your plant before repotting.
- Not loosening the root ball
Not loosening the root ball is another common mistake. When a plant is removed from its pot, the roots can often be tightly packed or ‘root-bound’. If the root ball is not loosened before repotting, the roots may struggle to spread out and absorb water and nutrients from the new soil. To avoid this, gently tease apart the root ball with your fingers before placing the plant in its new pot.
In conclusion, avoiding these common mistakes can make a big difference to the health and happiness of your plants. Remember, the key to successful repotting is preparation, care, and understanding the specific needs of your plant.
Advanced Plant Repotting Techniques
Now that you have a solid understanding of the basics of repotting, let’s take a step further and explore some advanced techniques. These methods can help you repot your plants more efficiently and ensure they thrive in their new homes. Remember, these techniques may require a bit more skill and patience, but the results can be truly rewarding.
- Double Potting
- Using a Potting Bench
- Root Pruning
Double potting is a technique where you place a potted plant into a larger pot without removing it from the original pot. This method is particularly useful for plants that don’t like their roots disturbed. It also makes it easier to move large plants around. To double pot a plant, simply find a larger pot that can accommodate the original pot. Fill the bottom of the larger pot with soil, place the original pot inside, and fill the gaps with more soil. Remember to water the plant after double potting to help it settle in its new environment.
A potting bench is a gardener’s workstation. It provides a comfortable height for working with your plants and keeps all your potting materials in one place. Using a potting bench can make the repotting process easier and more organized. You can keep your soil, pots, tools, and plants on the bench, reducing the need to bend over or move around too much. This can make the process more enjoyable and less tiring.
Root pruning is an advanced technique that involves trimming the roots of a plant before repotting. This can help control the size of the plant and encourage healthier, more compact growth. Root pruning should be done carefully to avoid damaging the plant. Use a sharp, clean pair of pruning shears to trim the roots. Remove any dead or diseased roots, and trim back the healthy roots by about a third. After root pruning, repot the plant in fresh soil and water it thoroughly.
In conclusion, these advanced repotting techniques can help you take your gardening skills to the next level. Remember, practice makes perfect. So don’t be afraid to try these techniques and learn from your experiences. Happy gardening!
Conclusion: Mastering the Art of Repotting
As we wrap up this comprehensive guide on repotting plants, it’s important to reflect on the key insights and lessons we’ve learned. Repotting is an art that requires patience, knowledge, and the right techniques. With time and practice, you can master this art and ensure your plants thrive in their new homes.
- Key Takeaways
- Understanding the basics of repotting is crucial. This includes knowing when and why to repot a plant.
- Each plant species has unique repotting needs. Always research the specific requirements of your plant.
- Following a step-by-step guide ensures you don’t miss any important stages in the repotting process.
- Common mistakes in repotting can be easily avoided with the right knowledge and preparation.
- Advanced techniques can help you repot even the most challenging plants.
- Continued Learning Resources
- Books: There are numerous books on gardening that offer in-depth knowledge on plant care, including repotting.
- Online Forums: Join online gardening communities where you can ask questions and learn from experienced gardeners.
- Workshops: Look for local gardening workshops or classes that offer hands-on learning experiences.
- Video Tutorials: Websites like YouTube have thousands of videos demonstrating various repotting techniques.
Here are the most important points to remember from our guide:
Mastering the art of repotting doesn’t stop here. There are many resources available to help you continue learning and improving your skills. Here are a few suggestions:
In conclusion, remember that repotting is a journey, not a destination. Each plant you repot will teach you something new. So, keep learning, keep practicing, and most importantly, enjoy the process!


